
It doesn't have to be difficult to set up your new Canon Pixma TR4720 printer! Wireless printing is made simple and effective with this little all-in-one printer, regardless of your level of technical expertise. This brief tutorial will show you how to execute the Canon TR4720 setup, including how to connect to Wi-Fi and have it up and running in a matter of minutes.
To begin with first, make sure you have the printer, the power cord, and the ink cartridges before opening the package. To install the cartridges and load paper, plug it in, switch it on, and then follow the instructions on the screen.
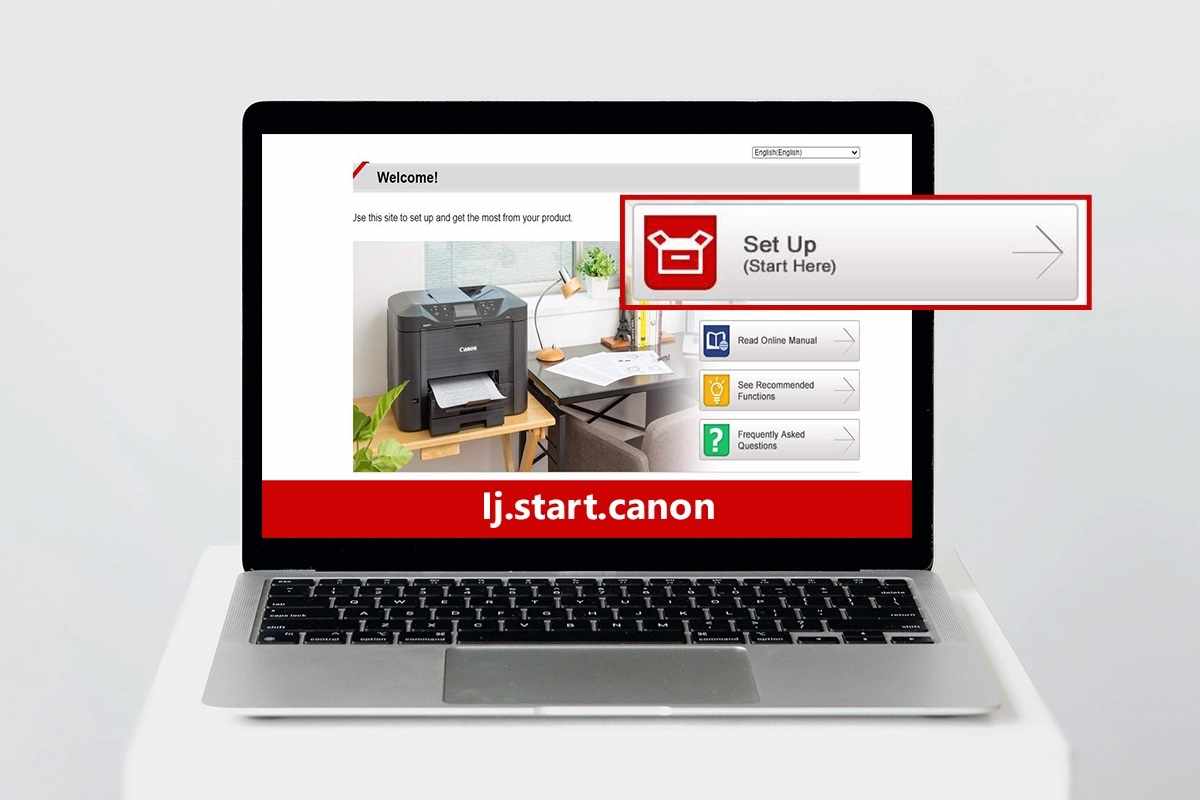
The Canon printer WiFi setup comes next. To get the Wi-Fi bulb to flash, press the printer's Wireless button. The setup software may now be downloaded at http //ij.start.canon. Drivers, user guides, and setup tools specific to your device are available on this official Canon website.
Choose the "Wireless Setup" option after the program has finished downloading. Your computer will look for printers in the area. When asked, choose your TR4720 and input your router password to connect it to your home Wi-Fi network. The remaining setting will be finished automatically by the program.
You may now print without a wire from any device, including laptops, tablets, and smartphones. For home offices or students seeking dependable, high-quality printing, the Canon Pixma TR4720 is perfect.
For more details or queries visit our website.

Write a comment ...